Arriving home at night and having to put the key in the dark to enter the house is something that has always bothered me. When we are at home and some are missing, we usually leave the light on but since there is not always someone at home, I have devised a system so that when it is dark and someone approaches the door, the light will come on.
To build it I used the following: 
- A 5V relay module.
- A PIR sensor.
- A potentiometer of 100K.
- A 1N4007 diode.
- A pair of resistances of 5k6.
- A resistance of 47k.
- An electrolytic capacitor of 100uF.
- A pair of BC546 transistors.
- An LDR.
- An electrical installation box that I bought in Chinese.
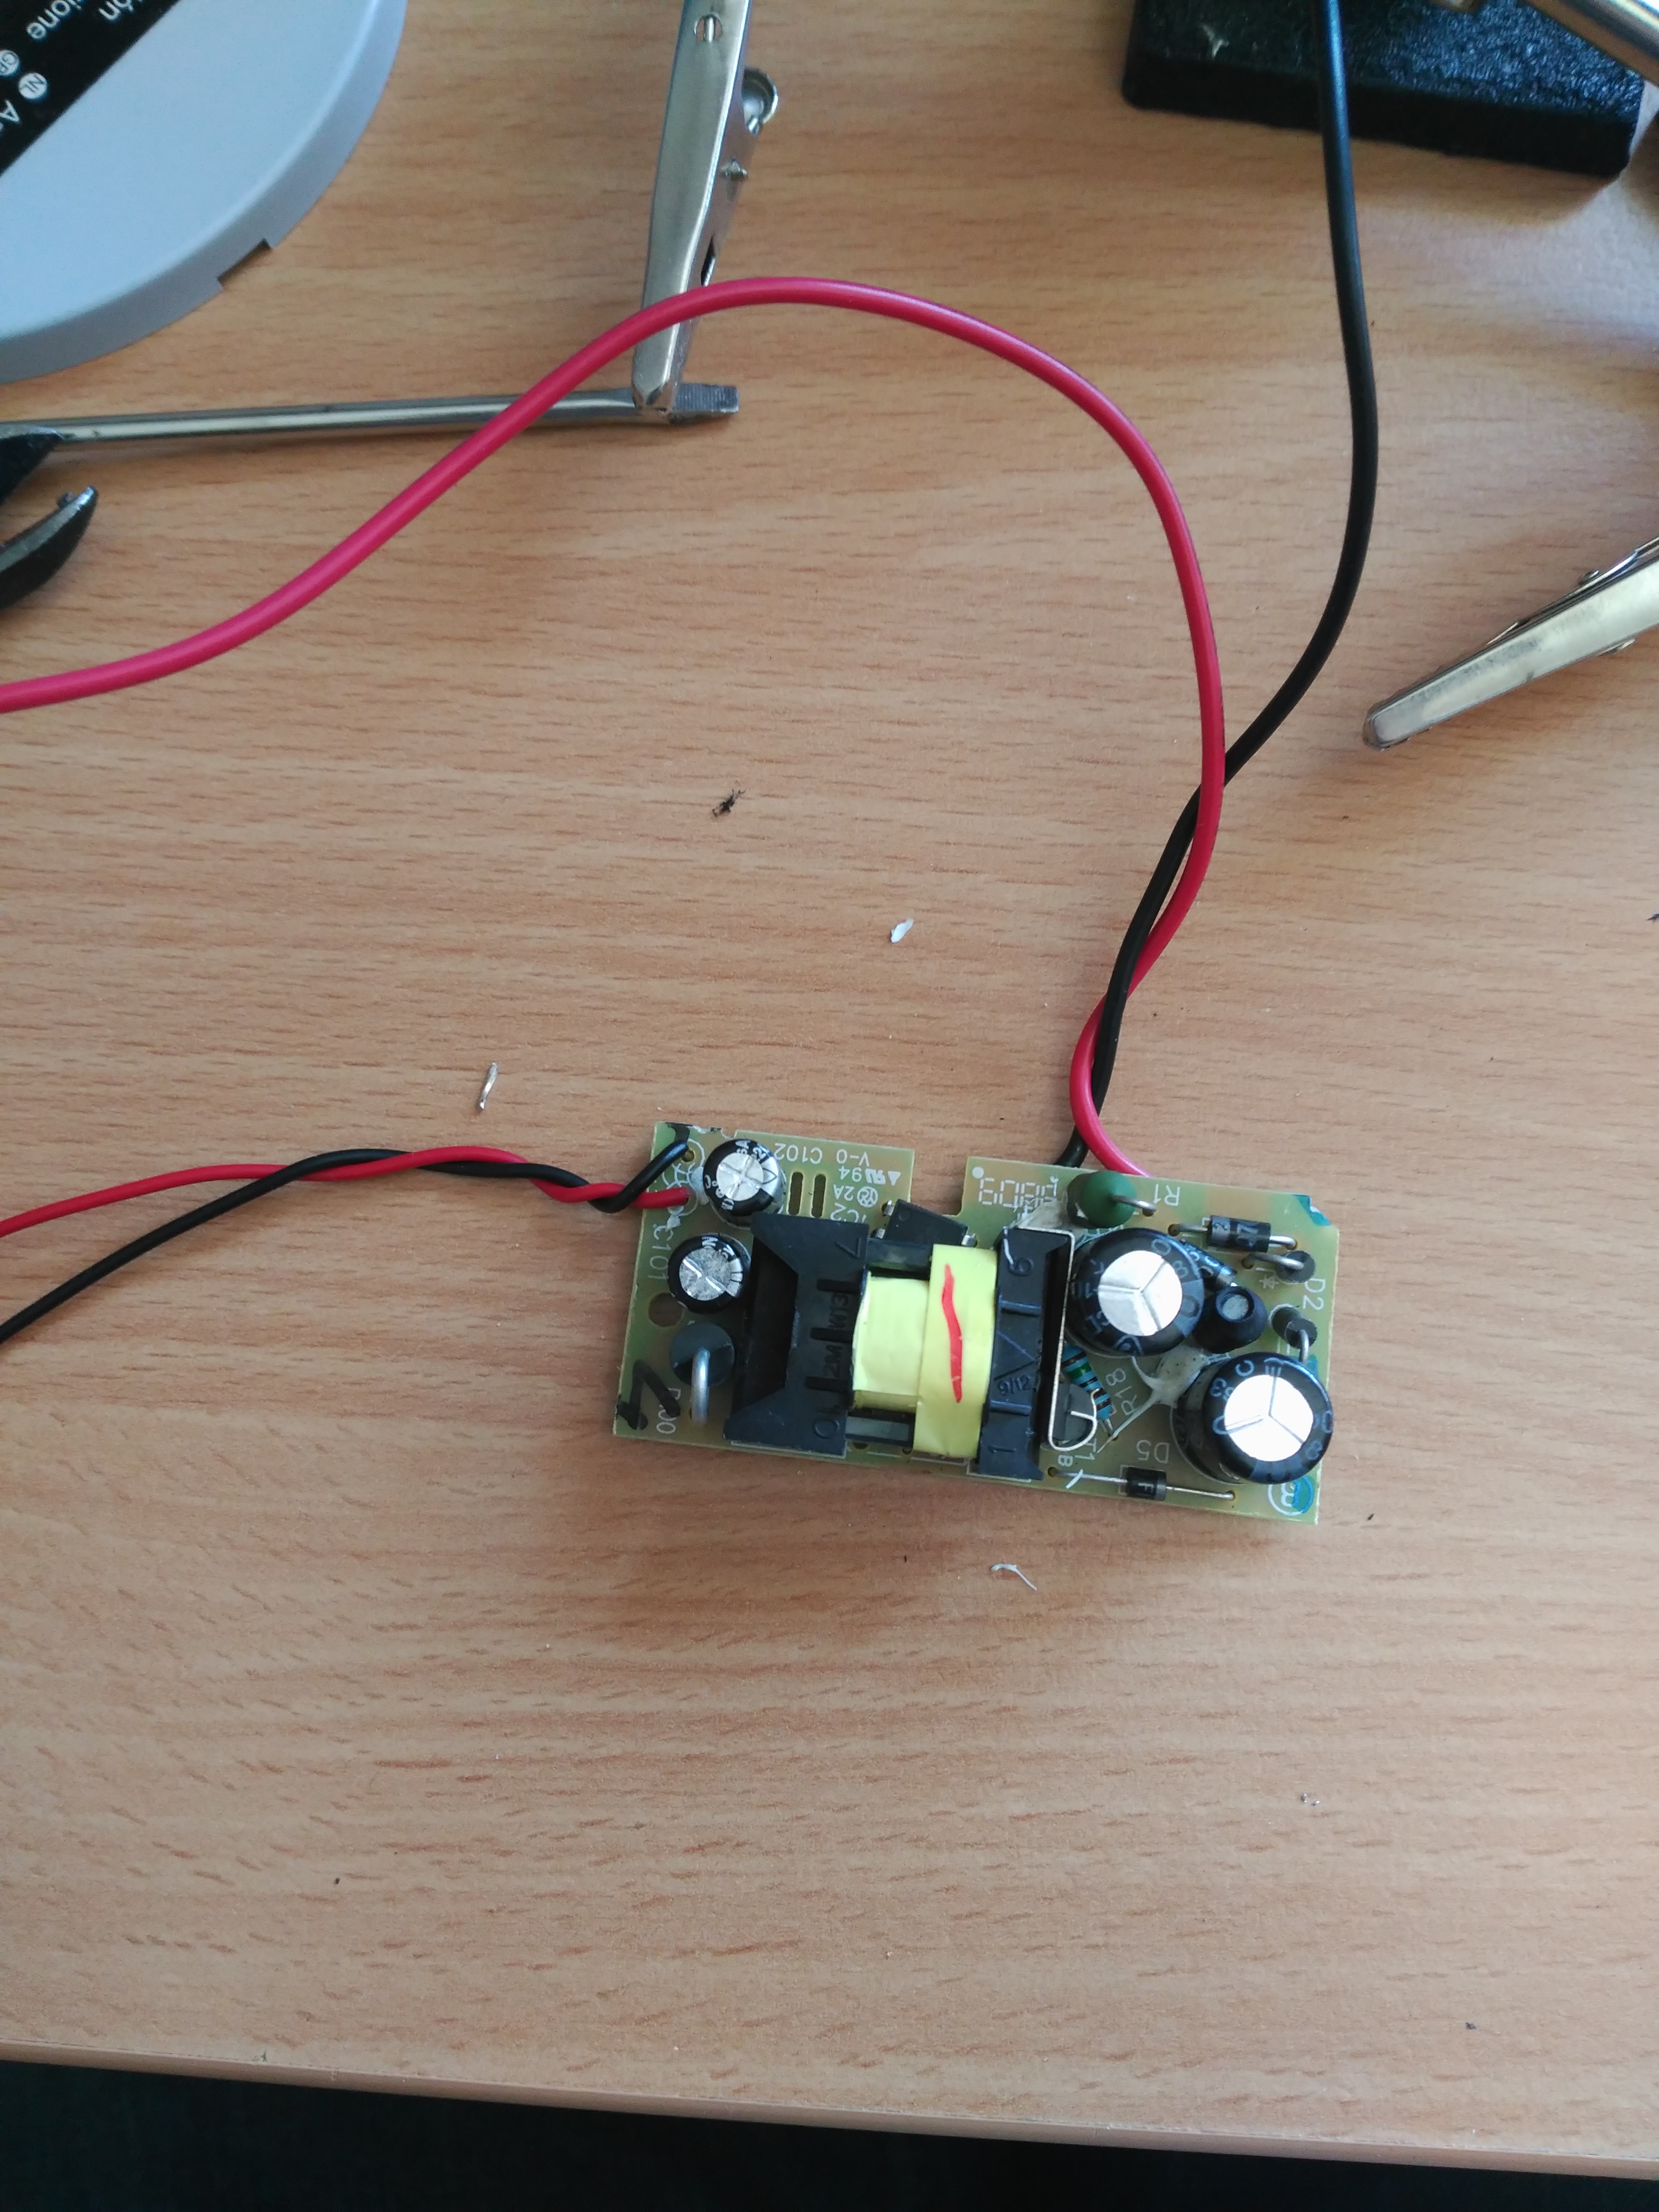
- A recycled mobile charger to get the 5V to power the circuit.
 The design of the circuit is simple: It consists of 4 stages: PIR, LDR circuit, inverter stage and relay control.
The PIR when it detects movement takes out 3.3-3.6 V, voltage with which the relay can not be activated directly. Between the potentiometer and the LDR a resistive divider is formed to polarize the first transistor. With the potentiometer we adjust the dark level to activate the transistor. Since when activating the first transient, the collector is grounded, we have the inverted output, so with another transistor we reinvest the output to have a high level when it is night and the PIR detects someone. In eagle I did not have the component of the relay module that I used, so I put a generic relay. (In case you miss missing the Flyback diode and other components). After doing some tests I realized that there is a critical hour of light in which the relay is activated and deactivated without stopping, so I decided to put a capacitor that eats those peaks at critical times. In future designs I will study using an opto with a triac.
Having put the capacitor does not solve the transistor instability zone when the light level is critical, so it remains to implement the circuit with a Schmitt Trigger.
Here you have a scheme in fritzing of the assembly:

The diode that I have placed is because the power supply that I used, being designed for a specific load (our phone) with little charge I was almost 6V and since in a silicon diode drop 0.7V, the account to feed to 5V. If you mount it with batteries the diode is not necessary.
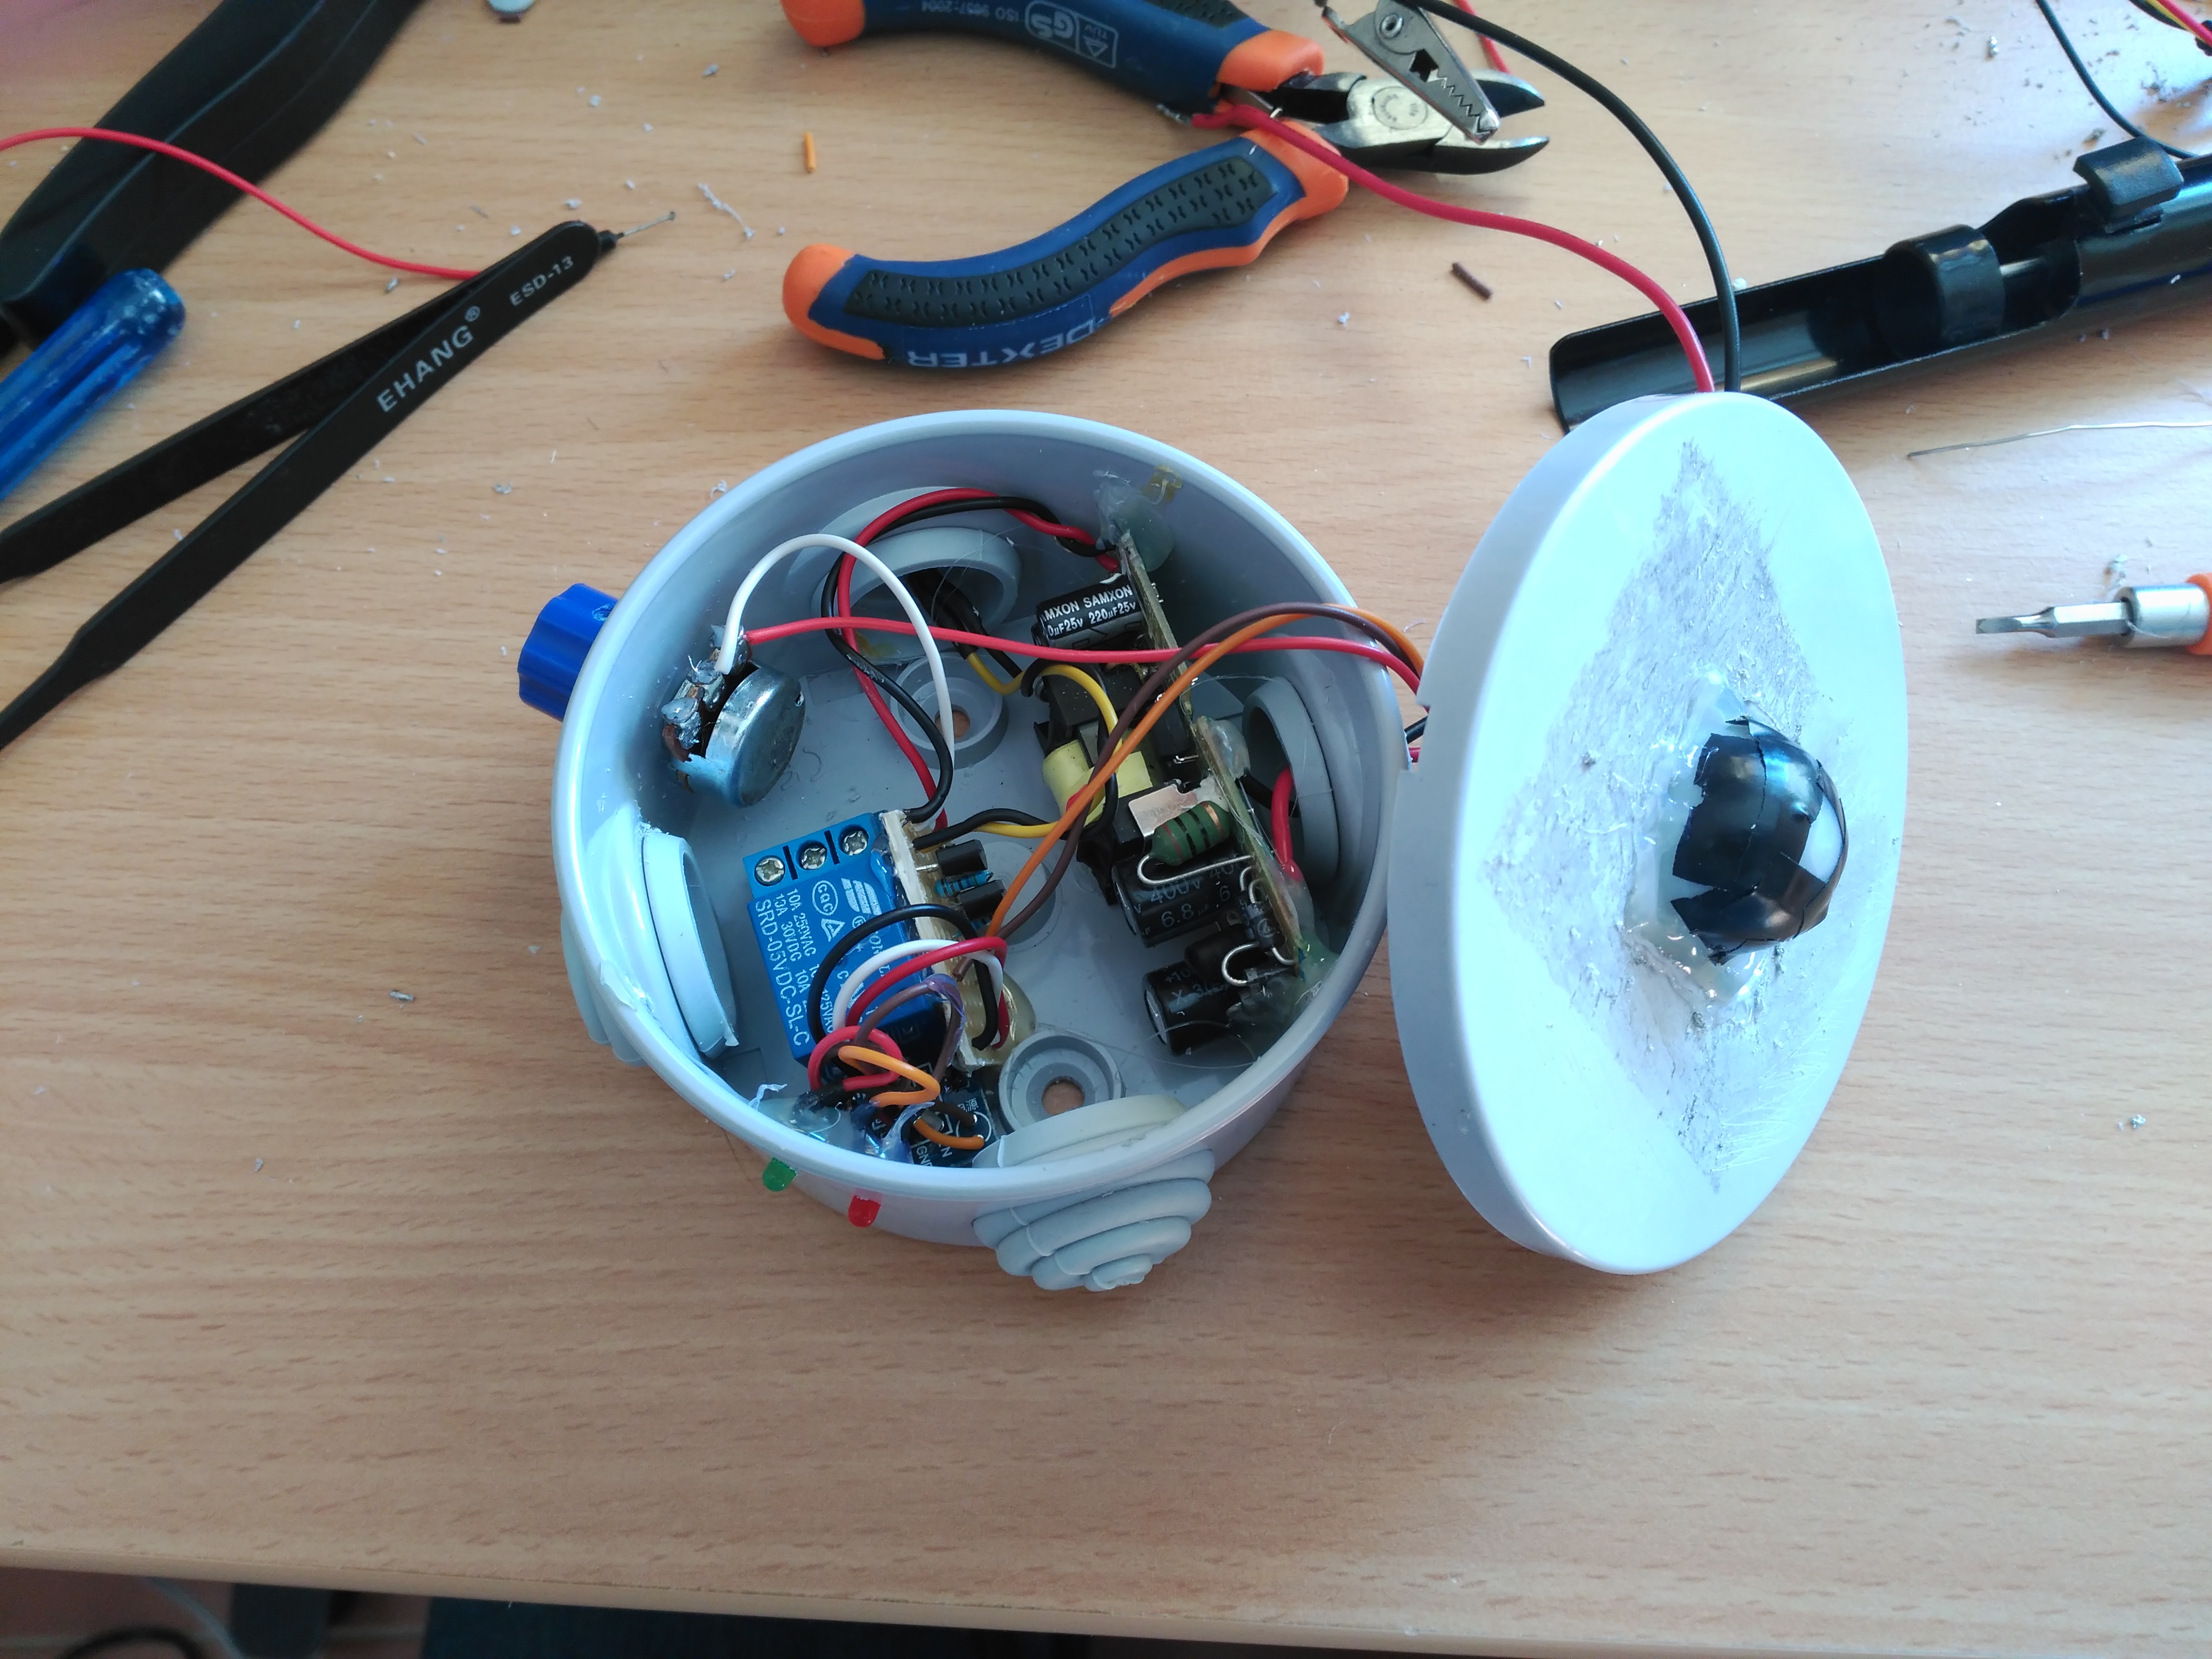
Box with mounted circuit
 Placement of the LDR
 The LEDs that go on the relay module board have been removed and mounted on the outside to be able to observe the status of the device and because well, the LEDs always do the beautiful things.
Taking advantage of the cables that go to the lamp, which have 230V to turn it on, I have taken out phase and neutral parallel to power the mobile transformer. The phase that would go to the lamp, I have passed it through the relay using the NO (normally open) and COM jacks. The assembly is very comfortable, but it has a drawback, if the interior switch that turns on the light is not on, the subject does not work hehe. So I'll try to make sure that in my house the switch should always be on for the system to work.
The step of the assembly has perhaps been the most complicated because you are drilling into the ceiling, the lamp is hanging and you are practically freehand holding everything. To fix it to the wall I took advantage of the marks that these boxes have, drilled and put 5mm studs.
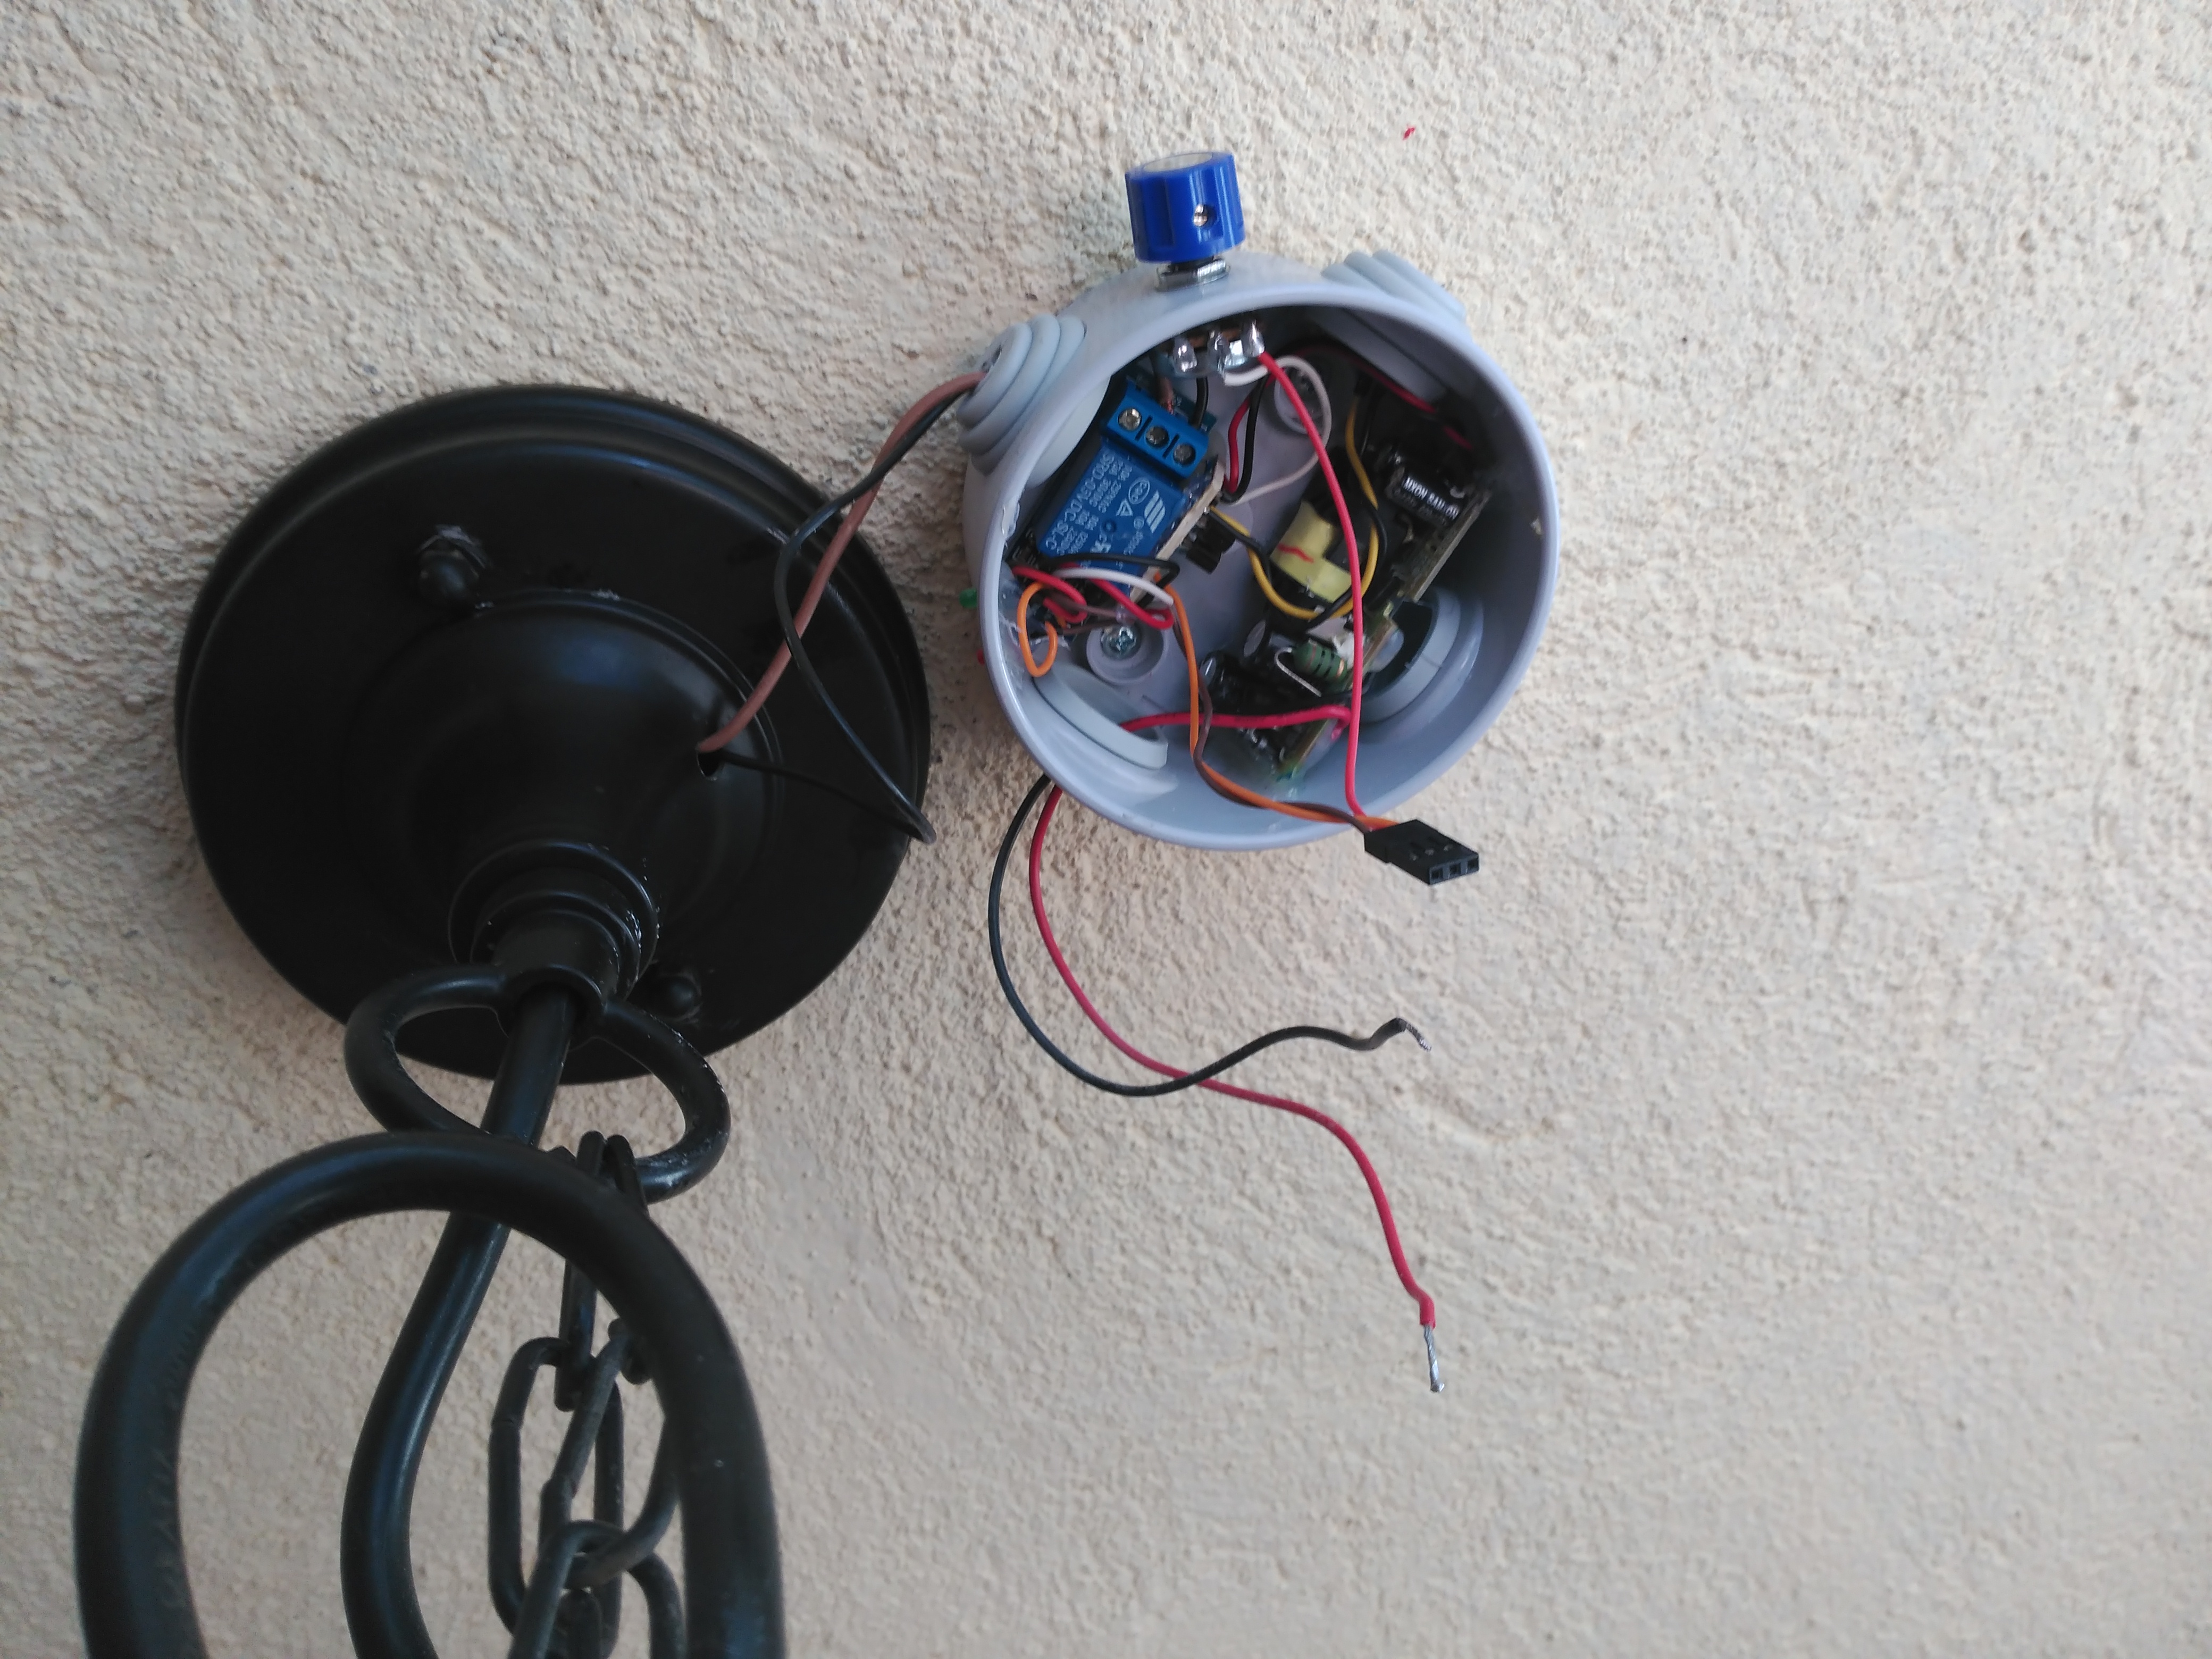
A little patience and everything ready. For the electrical assembly to the network, I advise to turn off the leads to be able to work with security without taking a scare.
 The PIR sensor has two potentiometers to adjust the trigger sensitivity, and the time that the active output keeps after detecting. If you are going to mount it, calibrate it before putting it to mount it on the roof, otherwise you will pull your hair. In my case I have adjusted it to detect an adult person and keep the status high 40 seconds. At the same time I used black tape to cover the Fresnell lens detection areas that did not interest me, detecting only vertically downwards in a small radius.
Finally in the following video you can see the operation of the device with the stellar performance of Mica:
https://youtu.be/SNWnCR_hBzo
0 Comments